Creating paper roll ornaments is not only a wonderful way to repurpose materials but also provides a fun, creative outlet that the whole family can enjoy. These handmade decorations can add a personalized charm to your home for any occasion—from Christmas to birthdays and beyond. This comprehensive guide will take you step by step through the process of making gorgeous paper roll ornaments, ensuring that your creations are easy to make, durable, and oh-so-beautiful.
Whether you’re a DIY enthusiast or a complete beginner, this guide has all the tips, tricks, and techniques you need. By the end, you’ll be ready to turn simple paper rolls into works of art that will impress your friends and family.
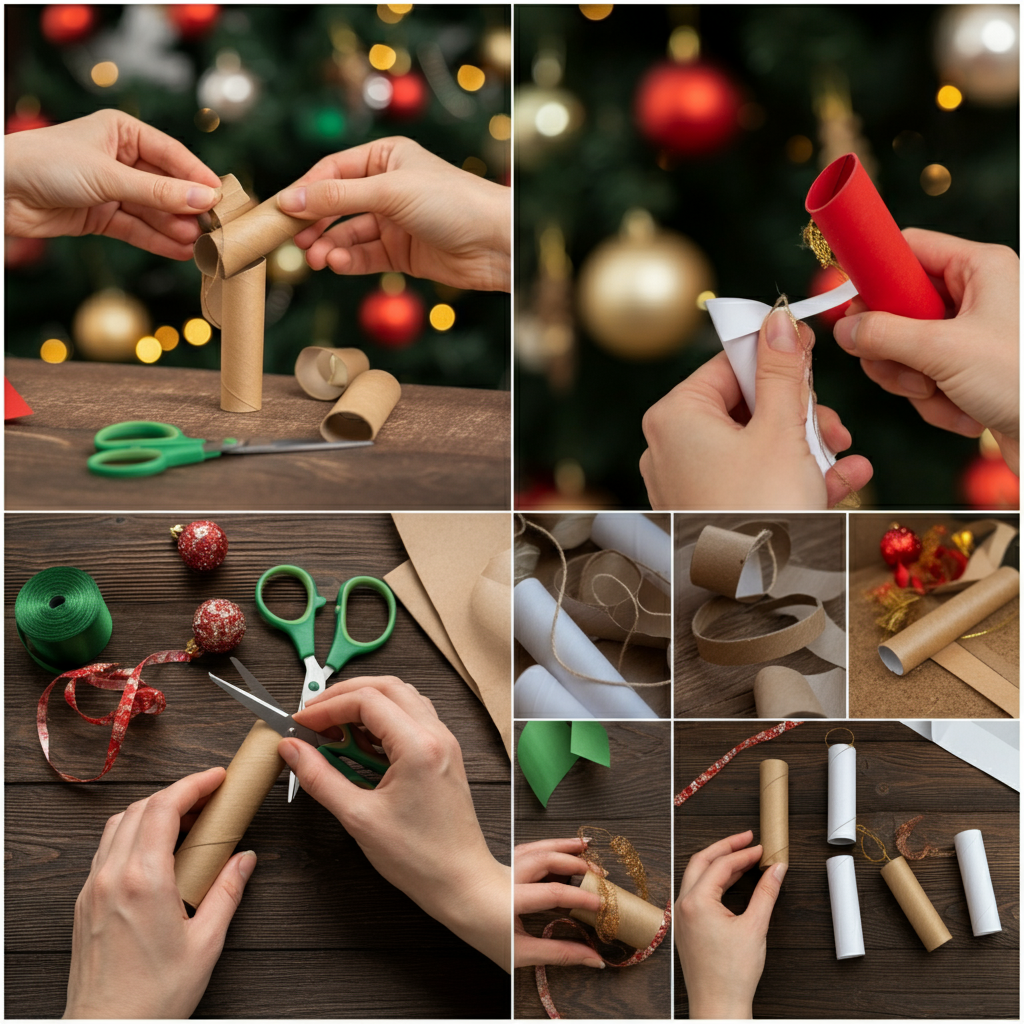
Materials You’ll Need
Before you get started, make sure you have all the necessary materials ready. Here’s what you’ll need for your paper roll ornament projects:
Basic Supplies
- Paper rolls (toilet paper rolls or paper towel rolls)
- Scissors or a craft knife
- Craft glue or a hot glue gun
- Acrylic paints or spray paints
- Paintbrushes
- Ruler and pencil
Optional Embellishments
- Glitter
- Beads or sequins
- Ribbons or twine
- Small charms or decorations
- Scrapbook paper or printed designs
- Decorative punches for unique shapes
Having these items ready will ensure a seamless creative process. You can always customize your ornaments further with additional materials based on your style and the occasion.
Basic Techniques for Paper Roll Ornament Making

Once you have all your materials ready, it’s time to jump into the process. Here are the foundational techniques you’ll need to master for making paper roll ornaments.
1. Cutting
Flatten the paper rolls slightly to make them easier to cut. Use a ruler and pencil to mark where you want to make your cuts. Typically, you’ll be cutting your rolls into thin rings or strips, but you can experiment with different shapes depending on your design. Precision is key here, so take your time for clean edges.
2. Shaping
After cutting, you can gently manipulate the rings to create different shapes. For example, pinch two sides of a ring to form a petal shape or bend strips into curves that match your design.
3. Gluing
Use craft glue or a hot glue gun to secure pieces together. Lay out your design first without glue to make sure everything fits. Then, glue pieces one at a time, holding each piece in place for a few seconds so the glue sets.
4. Painting
Apply a base coat of acrylic or spray paint to your ornament. You can paint individual pieces before assembly or paint the completed ornament. Add details like patterns or shading once the base coat dries.
These four techniques form the backbone of your project, and once you’ve mastered them, you can easily move on to more advanced designs.
Ornament Ideas for Different Occasions
Paper roll ornaments are versatile and can be tailored to any celebration. Here are some ideas to inspire your creativity.
Christmas
- Snowflakes made by arranging petal-shaped rings into symmetrical patterns.
- Stars constructed with strips of paper rolls folded into sharp angles.
- Mini Christmas trees painted green and adorned with beads as ornaments.
Halloween
- Spooky bats with wings cut from flattened rolls.
- Pumpkins formed by stacking orange-painted rings and adding a green leaf at the top.
- Spiders crafted from small rolls with thin strips for legs.
Birthdays
- Floral decorations for party decor using bright and colorful petals.
- Numbers and letters to personalize the celebration.
- Creative animals like butterflies or birds for a fun theme.
Everyday Decor
- Wall art made by assembling rings into intricate patterns.
- Mobile hanging ornaments for nurseries or living rooms.
The possibilities are endless. Once you start exploring, you’ll find that paper roll ornaments can be adapted to almost any theme or occasion.
Advanced Techniques and Embellishments
Take your paper roll ornaments to the next level with these advanced techniques and embellishments.
Adding Glitter
After painting your ornament, apply a thin layer of glue to the surface you want to sparkle. Sprinkle glitter generously, shake off the excess, and allow it to dry completely.
Beads and Sequins
Use small beads or sequins to add texture and dimension to your designs. These can be glued onto the ornament in patterns or scattered randomly for extra shimmer.
Ribbons and Twine
Attach ribbons or twine for hanging your ornaments or as decorative touches. A bow made from satin ribbon can instantly elevate the elegance of your creation.
Layering
Combine multiple paper roll elements to create layered designs. This adds depth and makes your ornaments look more complex and professional.
Experimenting with these techniques will take your creations from simple to stunning, ensuring they’re one-of-a-kind.
Tips for Making Your Ornaments Last
You’ve spent time and effort on your ornaments, so you’ll want them to last. Follow these tips to keep them in pristine condition year after year.
- Use durable glue like a hot glue gun for a stronger hold.
- Seal your ornaments with a clear varnish or mod podge to protect the paint and embellishments.
- Store carefully in a dry and temperature-controlled space. Wrap fragile ornaments in tissue paper to prevent damage.
By taking a few simple precautions, your paper roll ornaments can be enjoyed for many seasons to come.
Troubleshooting Common Issues
Even the most careful DIYers can run into hiccups. Here’s how to fix some common problems.
- Glue not sticking: Use hot glue instead of craft glue for a stronger bond.
- Paint running: Apply thin coats of paint and allow each layer to dry before adding the next.
- Uneven cuts: Use a sharp craft knife instead of scissors for cleaner edges.
Don’t be discouraged if your first attempts don’t turn out perfectly! Practice makes perfect, and each challenge you overcome will make you a better crafter.
Unleash Your Creativity
Creating paper roll ornaments is an eco-friendly, creative, and rewarding craft. Whether you’re making Christmas decorations, party decor, or everyday art pieces, these handmade treasures will add a personal touch to your home. Plus, it’s a fantastic way to reuse materials that would otherwise be discarded.
Now it’s your turn! Gather your materials, follow the techniques outlined above, and start crafting your first paper roll ornament today. You might just discover a new favorite hobby.
FAQ Section
What kind of paint works best for paper roll ornaments?
Acrylic paint is the most versatile option. It dries quickly, provides vibrant color, and sticks well to paper surfaces.
Can I use recycled paper rolls?
Absolutely! Recycled rolls from toilet paper or paper towels work perfectly for these projects. Just make sure they’re clean and free of any residue.
How can I involve kids in making paper roll ornaments?
Kids can help with simple tasks like painting, gluing, and adding embellishments. Always supervise them during cutting or when using a hot glue gun.
What’s the best way to hang paper roll ornaments?
Attach a small loop of ribbon or twine to your ornaments using glue or by threading it through a small hole.
Where can I find more ornament ideas?
Check out online crafting communities, Pinterest, or DIY blogs for endless inspiration!